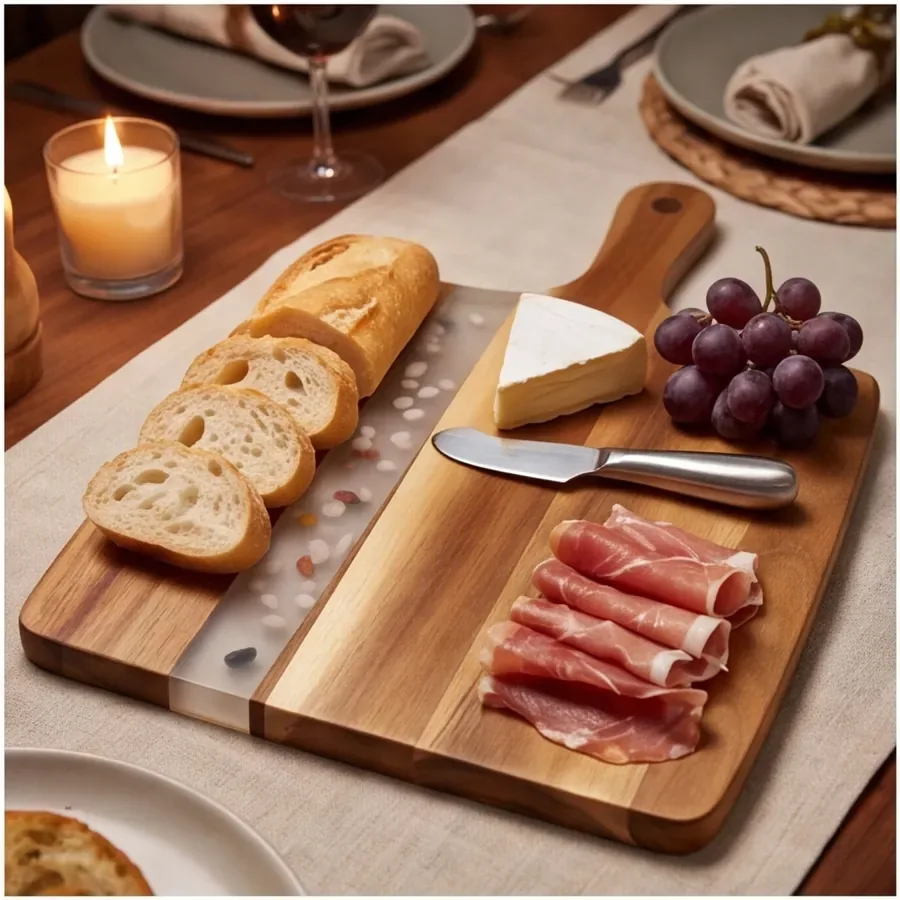
A resin and wood board is one of the easiest ways to make food look special. The natural grain and poured resin give you a built-in backdrop. This guide walks through charcuterie composition, color palettes, cheese platters, and grazing tables—plus tips to make it all photograph beautifully.
Looking for the perfect board to style? Browse PEIMI's serving boards and cheese boards.
Find a Board →Treat the Board as Your Canvas
Start with a clean, dry board. Decide on a "hero" element—a whole wheel of cheese, a large cut of cured meat, or a bowl of olives—and build around it. Leaving some of the wood or resin visible frames the food and shows off the board itself.
Balance Textures & Colors
- Contrast: Pair soft cheeses with crisp crackers, smooth resin with rough bread.
- Color discipline: Pick two dominant tones (e.g., warm wood + green herbs) and add one accent (red berries, orange apricots).
- Height: Use small bowls, stacked items, and folded meats to create levels.
Building a Charcuterie Board
- Place 2–3 cheeses spaced apart (soft, hard, blue).
- Fan cured meats in loose ribbons between them.
- Fill gaps with crackers, nuts, and fruit.
- Add fresh herbs or edible flowers as the final touch.
A hand-poured resin river visually divides sweet from savory sides—nature's own sectioning.
Styling a Cheese Platter
Offer a tasting arc: mild → aged → bold. Label the cheeses if guests are exploring. A small knife set and a honey drizzle elevate the experience. Boards make excellent gifts for hostesses who love to entertain.
Grazing Tables & Larger Spreads
For parties, line several boards end to end. Repeat colors across the run so the table reads as one composition. Mix board sizes and shapes for rhythm; the resin patterns keep each piece feeling unique.
Occasion Styling
| Occasion | Palette |
|---|---|
| Brunch | Soft pastels, berries, yogurt dip |
| Wine night | Deep reds, dark chocolate, cured meats |
| Holiday | Greens, gold accents, spiced nuts |
| Coastal summer | Blues of the resin, citrus, seafood |
Making It Photograph Well
Shoot from a 45° angle in natural light. The resin's gloss catches highlights—turn the board until the pour catches the light. Avoid harsh overhead flash, which flattens the wood grain.
Ready to host?
Pick a board that matches your table and message us for bulk or custom styling sets.
Shop Serving Boards →FAQ
How do I style a charcuterie board on a resin wood board?
Place 2–3 cheeses spaced apart, fan cured meats between them, then fill gaps with crackers, nuts, and fruit. Add herbs or edible flowers last. Let some resin show as a natural divider.
What colors work best on a resin board?
Pick two dominant tones from the board and one accent. A blue resin river pairs well with citrus, whites, and greens; warm wood tones suit reds and golds.
Can I use the board for hot food?
Serve room-temperature and cold items. Avoid placing hot pans directly on the resin, and keep the board out of the dishwasher.
How do I clean a board after styling?
Hand wash with mild soap and warm water, dry upright, and re-oil the wood side as needed. See the full care guide for details.
What size board should I use for a party?
One large board serves 4–6. For bigger groups, line several boards into a grazing table and repeat colors across them.
Are resin boards food safe for serving?
Yes, when made with food-safe, fully cured epoxy. PEIMI boards use food-grade resin suitable for serving and light prep.
How do I make the board photograph well?
Shoot at a 45° angle in natural light, rotating the board until the resin pour catches a highlight. Avoid harsh flash.
Can I get a custom board for events?
Yes. PEIMI offers custom resin colors, sizes, and engraving—ideal for weddings and corporate events.